覚醒
データフォルダーが /local/SQL の場合
/etc/my.conf.d/mariadb-server.cnf
[mysqld]
#datadir=/var/lib/mysql
datadir=/local/SQL/mysql
socket=/local/SQL/mysql/mysql.sock
log-error=/local/SQL/mariadb/mariadb.log
character-set-server=utf8
まあこんなところか. ほんで
systemctl start mariah
うん?
mysqld: Can't create/write to file '/local/SQL/mysql/aria_log_control' (Errcode: 13 "Permission denied")
マウントの仕方間違えたか.
chmod og+rx /local/SQL
再トライ:
/usr/libexec/mysql-prepare-db-dir
gss_acquire_cred failed -Unspecified GSS failure
なんやこれ. ケルベロス認証だとか凝ったもん使うんだな. こいつは /etc/my.cnf.d/auth_gssapi.cnf をコメントアウトするらしいぞ.
さらに, いろいろ問題があったSQLパスワード盗聴問題を解決するような工夫がされているようだ.まあFacebook開くわけではないので,とりあえずOFFだ. /etc/my.cnf.d/enable_encryption.preset を全部コメントアウト.
mysqld: Got error 'Can't open file' when trying to use aria control file '/local/SQL/mysql/aria_log_control'
なんじゃこれは. journalctl -xe によると SELinux is preventing mysqld from getattr access on the file /local/SQL/mysql/ibdata1 だとか.
またお前か. 死ね. selinuxは無効とする.
systemctl start mariadb
おお・・・お立ちになられたぞ.
[root@webmix3 ~]# mysql
ERROR 2002 (HY000): Can't connect to local MySQL server through socket '/var/lib/mysql/mysql.sock' (2)
なんや立ってるだけじゃんか.どうするんだこれ.
ここ読まねんと進まない感じあり.Oracleディスり方がぱねえが.ドンキホーテか?お前ら.敵は地球上のすべてのサラリーマンの給与を把握しているんだぞ.巨大すぎてコアにミサイルでも突っ込まねえと飛ばねえぞ?
初期設定
mysql_secure_installation を実行する.
ERROR 2002 (HY000): Can't connect to local MySQL server through socket '/var/lib/mysql/mysql.sock' (2)
おん?よく見たらsocketの場所が違う気がする.サーバーがsocket違うところで動かしてるからな. clientも知らないとやばいんだよ. /etc/my.cnf.d/client.cnf だな.
[client]
socket=/local/SQL/mysql/mysql.sock
default-character-set=utf8
よくわからねえのでDBのファイルを元の位置に戻して初期化だけしてみる:
root@webmix3 ~]# mysql_secure_installation

NOTE: RUNNING ALL PARTS OF THIS SCRIPT IS RECOMMENDED FOR ALL MariaDB
      SERVERS IN PRODUCTION USE!  PLEASE READ EACH STEP CAREFULLY!

In order to log into MariaDB to secure it, we'll need the current
password for the root user.  If you've just installed MariaDB, and
you haven't set the root password yet, the password will be blank,
so you should just press enter here.

Enter current password for root (enter for none):
OK, successfully used password, moving on...

Setting the root password ensures that nobody can log into the MariaDB
root user without the proper authorisation.

Set root password? [Y/n] Y
New password:
Re-enter new password:
Password updated successfully!
Reloading privilege tables..
Reloading privilege tables..
 ... Success!


By default, a MariaDB installation has an anonymous user, allowing anyone
to log into MariaDB without having to have a user account created for
them.  This is intended only for testing, and to make the installation
go a bit smoother.  You should remove them before moving into a
production environment.

Remove anonymous users? [Y/n] Y
 ... Success!

Normally, root should only be allowed to connect from 'localhost'.  This
ensures that someone cannot guess at the root password from the network.

Disallow root login remotely? [Y/n] n
 ... skipping.

By default, MariaDB comes with a database named 'test' that anyone can
access.  This is also intended only for testing, and should be removed
before moving into a production environment.

Remove test database and access to it? [Y/n] Y
 - Dropping test database...
 ... Success!
 - Removing privileges on test database...
 ... Success!

Reloading the privilege tables will ensure that all changes made so far
will take effect immediately.

Reload privilege tables now? [Y/n] Y
 ... Success!

Cleaning up...

All done!  If you've completed all of the above steps, your MariaDB
installation should now be secure.

Thanks for using MariaDB!
だとさ.
[root@webmix3 ~]# mysql -u root -p
Enter password:
Welcome to the MariaDB monitor.  Commands end with ; or \g.
Your MariaDB connection id is 19
Server version: 10.3.11-MariaDB MariaDB Server

Copyright (c) 2000, 2018, Oracle, MariaDB Corporation Ab and others.

Type 'help;' or '\h' for help. Type '\c' to clear the current input statement.

MariaDB [(none)]>
お目覚めになられたぞ・・・
誰でもOK
マリアさまなのだから,誰とでもOKにしてしまいたい.
MariaDB [(none)]> show grants;
+----------------------------------------------------------------------------------------------------------------------------------------+
| Grants for root@localhost                                                                                                              |
+----------------------------------------------------------------------------------------------------------------------------------------+
| GRANT ALL PRIVILEGES ON *.* TO 'root'@'localhost' IDENTIFIED BY PASSWORD '*1E4C8F6FC580EBE7DFE67A3D6623290B973FBD46' WITH GRANT OPTION |
| GRANT PROXY ON ''@'%' TO 'root'@'localhost' WITH GRANT OPTION                                                                          |
+----------------------------------------------------------------------------------------------------------------------------------------+
2 rows in set (0.000 sec)
このへんだよな. いつも困るんだけど.ううん・・・今んとこ旦那(localhost)専用になってるな.もちっと広い心を持って欲しいな.
まずはユーザー表示で
MariaDB [(none)]> select User,Host from mysql.user ;
+----------+--------------+
| User     | Host         |
+----------+--------------+
| root     | %            |
| root     | 127.0.0.1    |
| root     | ::1          |
| root     | localhost    |
| root     | webmix3      |
+----------+--------------+
なるほど.
MariaDB [(none)]> grant all privileges on *.* to root@"10.249.229.%" identified by '外部接続用パスワードをなんと平文でここに書く' with grant option;
これで研究室内部からはアクセスできる:
[sugimoto@sun2 ~]$ mysql -h 10.249.229.209 -u root -p
Enter password:
Welcome to the MariaDB monitor.  Commands end with ; or \g.
Your MariaDB connection id is 26
Server version: 10.3.11-MariaDB MariaDB Server
Copyright (c) 2000, 2018, Oracle, MariaDB Corporation Ab and others.
Type 'help;' or '\h' for help. Type '\c' to clear the current input statement.
MariaDB [(none)]>
なるへそ. sun2からでもOKならば, お家からSSHトンネルもできるはずだよね.
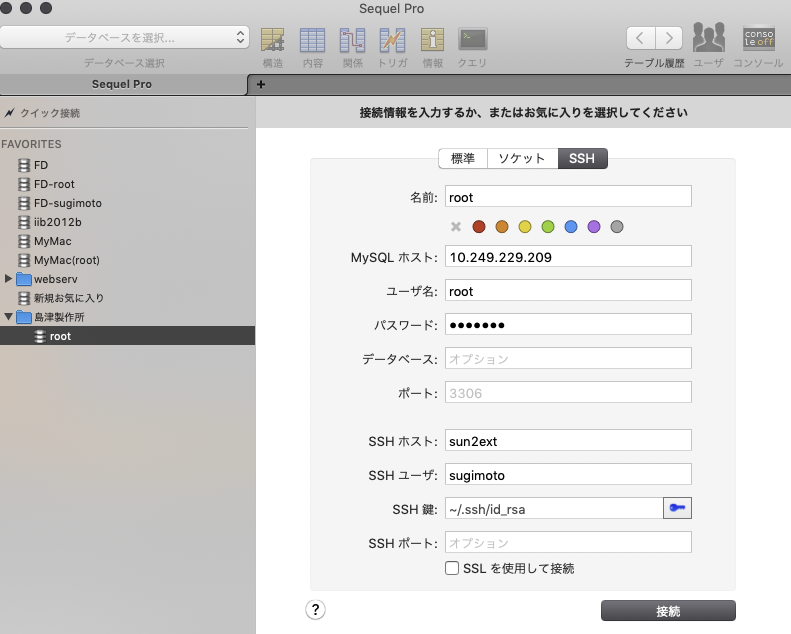
これで接続!
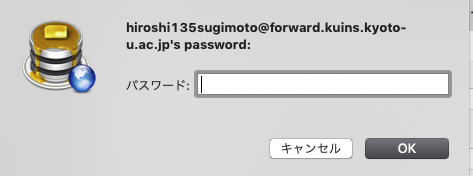 むろんあんたのSPS-IDだったかACS-IDだったかなんかだ.
これで接続できましたとさ.
PHPも使うよね
いやだ.俺はPHPは嫌いだ.コードが汚らしい気がするんだよ(お前のコードが汚いだけだ,と言われそうだが).なんでか知らんけど,虫がすかぬ.でも,使わないといけない(のか?).現状WebからSQLアクセスするのに使っているからなあ・・・嫌なんだけど.あ,もちろん,PHPを理解する気は 1μmもない.動きさえすれば良い.それ以上の興味は一切ない.仕事でなければ,ゼーッたい,触らなえよ.
で,面倒臭いので,手っ取り早く動くようにするためにPHP_MYADMINをインストールする.動作確認もついでにできちまうからな.まあ要するに
curl https://files.phpmyadmin.net/phpMyAdmin/5.0.1/phpMyAdmin-5.0.1-all-languages.zip -o yAdmin-5.0.1-all-languages.zip
出てきたファイルを解凍し,
mv phpMyAdmin-*/ /usr/share/phpmyadmin
mkdir -p /var/lib/phpmyadmin/tmp
chown -R apache:apache /var/lib/phpmyadmin
mkdir /etc/phpmyadmin/
cp /usr/share/phpmyadmin/config.sample.inc.php  /usr/share/phpmyadmin/config.inc.php
ほんで config.inc.php を編集:
$cfg['blowfish_secret'] = 'H2OxcGXxflSd8JwrwVlh6KW6s2rER63i';
$cfg['TempDir'] = '/var/lib/phpmyadmin/tmp';
/etc/httpd/conf.d/phpmyadmin.confを作成:
Alias /phpMyAdmin /usr/share/phpmyadmin/

Alias /phpmyadmin /usr/share/phpmyadmin/
<Directory /usr/share/phpmyadmin/>
AddDefaultCharset UTF-8
<IfModule mod_authz_core.c>
# Apache 2.4
Require all granted
</IfModule>
<IfModule !mod_authz_core.c>
# Apache 2.2
Order Deny,Allow
Deny from All
Allow from 127.0.0.1
Allow from ::1
</IfModule>
</Directory>
んでhttpdを再起動:
apachectl configtest
systemctl restart httpd
これで,http://IPADRESS/phymiadmin が動作する.